
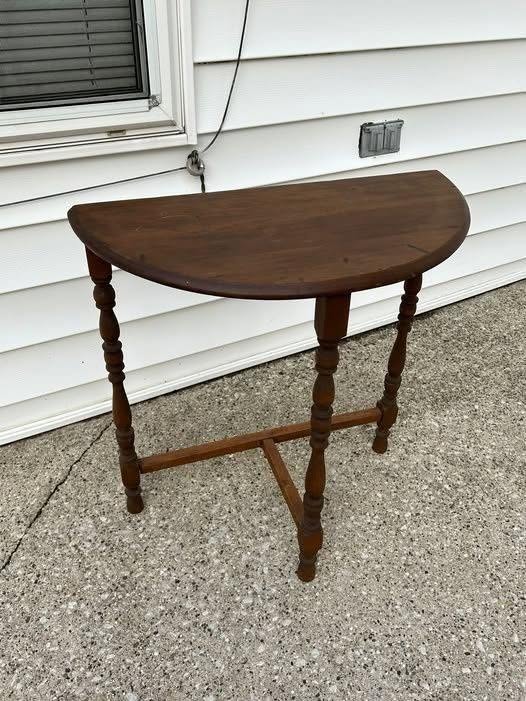
Step 1: Clean the Piece
Wipe the entire table down with a damp cloth, or a rag dampened with diluted dish soap if it’s picked up any grime — which is likely if, like this one, it’s been sitting outside or in a garage. Let it fully air dry before moving on. Painting over dust or residue is one of the most common reasons DIY paint jobs end up looking patchy or peeling early.
Step 2: Scuff Sand — Don’t Strip
This is the step that replaces stripping entirely. Using your 150–220 grit sandpaper, go over every surface of the table — top, legs, the stretcher bar underneath — just enough to dull the existing shine. You’re not trying to remove the old finish, you’re just roughing it up slightly so the new paint has something to hold onto. On turned legs with grooves and curves, a folded piece of sandpaper or a flexible sanding sponge gets into the detail work more easily than a flat block.
Step 3: Wipe Away the Dust
Once you’re done sanding, wipe the whole piece down again with a slightly damp cloth or a tack cloth to remove all the fine sanding dust. Skipping this step is the easiest way to end up with a slightly gritty, uneven paint finish.
Step 4: Spot-Treat Problem Areas (Only If Needed)
If there are deep gouges, water rings, or dark stains that look like they might bleed through paint, hit just those spots with a light coat of stain-blocking primer before your color coat. For a piece in decent shape, you can likely skip this step entirely — only bother if you actually see problem spots.
Step 5: Spray Paint in Light Coats
Set the table on your cardboard or drop cloth in a well-ventilated space. Apply your spray paint in 2–3 light, even coats, letting each one dry per the can’s instructions (usually 20–30 minutes between coats) rather than trying to get full coverage in one heavy pass — heavy coats are what cause drips, uneven texture, and much longer dry times.
Prioritize the surfaces people will actually see: the tabletop and the outward-facing parts of the legs. For a temporary piece, there’s no need to fuss over the underside or the inner curves of the legs where nobody’s looking.
Step 6: Skip the Topcoat
For a “doesn’t need to be fancy, temporary” project, a sealer or topcoat is genuinely optional — it’s the easiest step to cut if your goal is minimizing time and products. Save that step for pieces you’re planning to keep and use heavily long-term.
What This Actually Costs and Takes
Realistically: one or two cans of spray paint plus a sheet of sandpaper runs under $20 total, and the hands-on time is well under an hour, spread across a couple of short sessions to allow for dry time in between. For a $5 table, that’s a very reasonable total investment for something that goes from “plain and a little tired-looking” to “cute enough to actually want in your entryway.”
The Bigger Lesson in Projects Like This
Not every piece of furniture deserves — or needs — the full refinishing treatment. Matching the effort to the actual lifespan and purpose of the piece is honestly the smarter move most of the time. A beloved heirloom dresser you’re keeping for decades is worth stripping, staining, and sealing properly. A $5 side table you’ll use for six months before a move is not — and pretending otherwise just means more time and money spent on something that was never meant to be permanent in the first place.
Sometimes the best DIY decision is knowing exactly how much effort a project is actually worth, and stopping there.
